
Introduction
Installing an industrial water softener correctly is essential for achieving reliable hardness removal, stable regeneration performance, and long equipment life. Whether the system is used for boiler feed water, cooling towers, manufacturing, or process water treatment, proper installation can significantly reduce maintenance costs and improve operating efficiency.
This water softener industrial installation guide explains the main system components, installation requirements, resin loading procedures, piping recommendations, and startup tips for commercial and industrial applications.
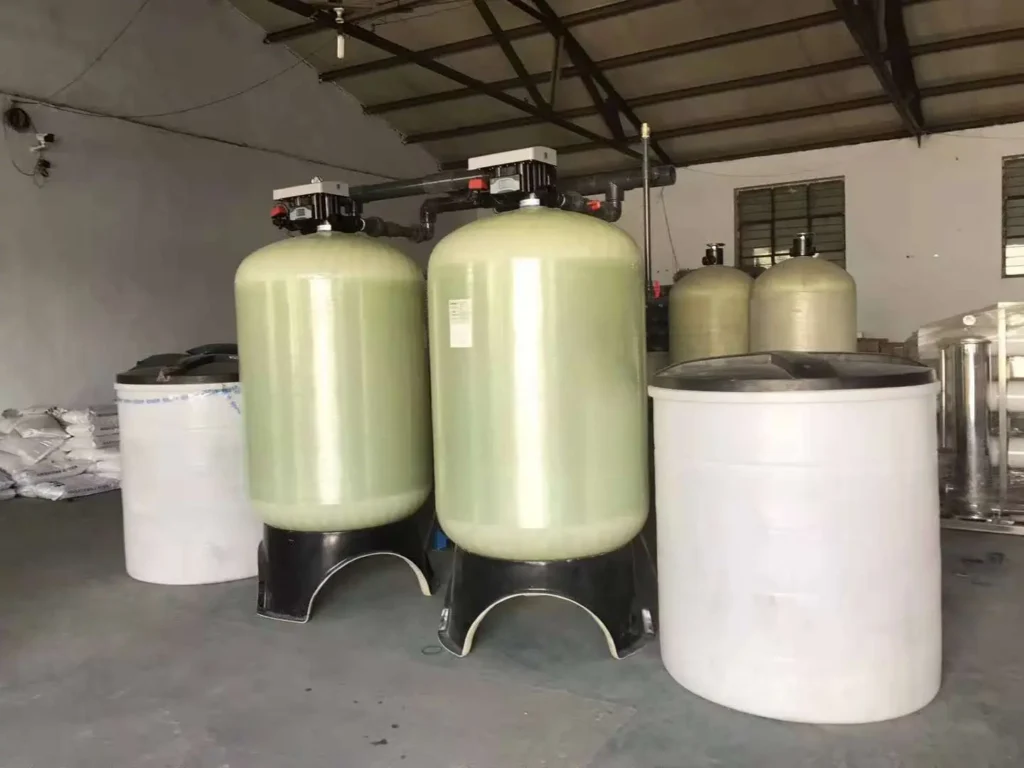
Main Components of an Industrial Water Softener
Instead of simply listing parts, explain why they matter.
High-Performance Automatic Control Valve
Industrial softeners typically use automatic multi-port control valves that manage service, backwash, brine draw, slow rinse, fast rinse, and regeneration cycles. Depending on system size, valves may be manufactured from reinforced engineering plastic, lead-free brass, or stainless steel.
FRP Pressure Vessel
Most industrial systems use fiberglass reinforced plastic (FRP) pressure vessels because they are lightweight, corrosion-resistant, and capable of long-term operation. Carbon steel or stainless steel vessels are also available for special applications.
Water Distribution System
Upper and lower distributors ensure uniform water flow through the resin bed, maximizing ion exchange efficiency while preventing channeling.
Strong Acid Cation Exchange Resin
High-quality resin provides:
- High exchange capacity
- Uniform bead size
- Low breakage rate
- Longer service life
- Stable softening performance
Industrial Water Softener Installation Requirements
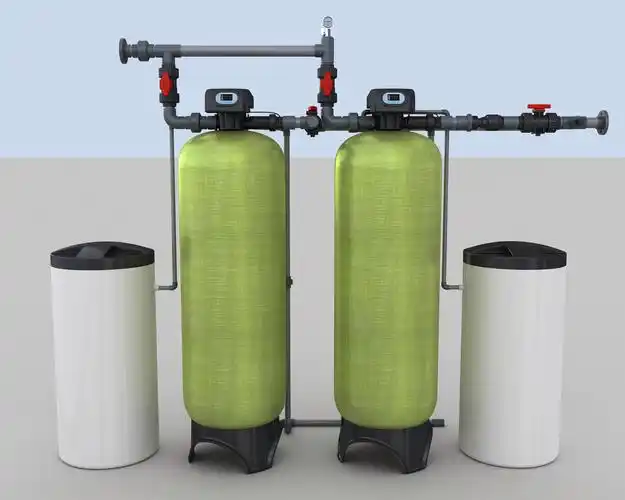
Install on a Stable Foundation
The equipment should be installed on a flat reinforced concrete base capable of supporting the fully loaded operating weight. Floor drainage should be available nearby.
Position the Brine Tank Properly
Install the brine tank as close as possible to the resin vessel to minimize the brine suction line and improve regeneration efficiency.
Protect the Equipment from Extreme Temperatures
Install the system indoors whenever possible. The equipment should be protected from freezing temperatures, direct sunlight, and excessive heat.
Leave Enough Maintenance Space
Provide sufficient clearance around the equipment for:
- Salt refilling
- Valve maintenance
- Resin replacement
- Routine inspection
Install Check Valves When Required
When connected directly to boilers or other pressure equipment, install a check valve to prevent reverse flow.
Resin Loading Procedure
Step 1
Install and center the riser pipe inside the pressure vessel.
Seal the pipe opening temporarily to prevent resin from entering.
Step 2
Verify the bottom distributor is correctly installed.
Step 3
Carefully pour the cation exchange resin evenly around the riser pipe.
Step 4
Maintain the riser pipe in the center throughout the filling process.
Step 5
Remove the protective tape from the riser pipe.
Step 6
Install the control valve carefully, ensuring the riser pipe is fully inserted before tightening.
Industrial Water Softener Piping Requirements
Install Isolation Valves
Both inlet and outlet piping should include isolation valves for maintenance.
Install a Bypass Line
A bypass allows the system to remain operational during maintenance or resin replacement.
Install a Y-Strainer
A Y-strainer on the inlet pipe prevents sand, rust, and debris from damaging the control valve.
Keep Drain Lines Short
Use the shortest practical drain line with minimal elbows to reduce back pressure during regeneration.
Maintain an Air Gap
The drain pipe should discharge above the drain to prevent wastewater from siphoning back into the softener.
Support All Pipework
Pipe supports should carry the pipe weight independently. Never allow piping stress to be transferred to the control valve.
Commissioning and Controller Setup
After the installation is complete, the industrial water softener should be properly commissioned before being placed into normal operation. This includes configuring the regeneration controller, verifying the regeneration cycle, and testing the outlet water hardness.
Setting the Time Clock Regeneration Controller
For time-clock controlled water softeners, the regeneration schedule should be configured according to the customer’s operating requirements.
To set the current time:
- Press the red time-setting button on the side of the controller to disengage the 24-hour dial.
- Rotate the 24-hour dial until the current time aligns with the time indicator.
- Release the button to lock the setting.
Example:
- If the current time is 10:00 AM and you want regeneration to occur at the factory preset time, align 10:00 AM with the time indicator.
- To delay regeneration by two hours, align 8:00 AM with the indicator.
- To advance regeneration by two hours, align 12:00 PM with the indicator.
Setting the Regeneration Frequency
The day wheel controls how often regeneration occurs.
Each tab represents one day. Pulling out selected tabs determines the regeneration schedule.
For example:
- Pull out every other tab to regenerate once every two days.
- Pull out every third tab to regenerate once every three days.
The regeneration interval should be selected based on feed water hardness, resin capacity, and daily water consumption.
Setting the Metered (Flow-Controlled) Regeneration Controller
For metered regeneration systems, regeneration is initiated after a preset volume of treated water has been produced.
To configure the controller:
- Disconnect the flow meter cable.
- Hold the outer flow dial and lift the setting dial.
- Rotate the dial until the required treated water capacity aligns with the reference mark.
- Release the dial to engage the gear.
- Rotate the flow dial until the selected capacity aligns with the flow indicator.
- Reconnect the flow meter cable.
The regeneration capacity should be calculated according to resin volume, water hardness, and the expected operating flow rate.
Manually Starting a Regeneration Cycle
If outlet hardness exceeds the specified limit or maintenance is required, a manual regeneration can be performed.
Rotate the manual regeneration knob clockwise to start the regeneration cycle.
The controller will automatically complete each regeneration stage, including:
- Backwash
- Brine Draw
- Slow Rinse
- Fast Rinse
- Brine Refill (if applicable)
- Return to Service
After the cycle is completed, the softener will automatically return to normal soft water production.
Conclusion
Proper installation is the foundation of reliable soft water production. By following the recommendations in this water softener industrial installation guide, operators can maximize resin life, reduce maintenance costs, improve regeneration efficiency, and ensure long-term system performance. Whether the system is designed for boiler feed water, cooling towers, manufacturing, or commercial applications, correct installation helps protect equipment and lower overall operating costs.