
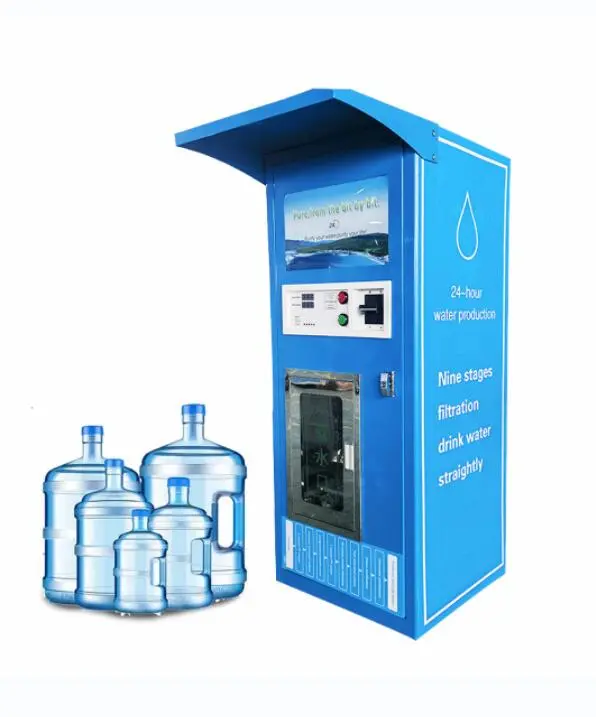
If a water vending machine isn’t properly protected during cold weather, it’s prone to freezing and cracking, which can lead to leaks, electrical faults, and other safety issues. To keep your water vending machine running smoothly through the winter, taking the right maintenance steps is essential. Here’s a quick guide to winter care for water vending machines.
Electrical Connections
Check that live and neutral wires are correctly connected
Use a voltage tester to identify which external wire is live and which is neutral.
Follow the “live on the left, neutral on the right” rule to verify the connections are correct. If not, rewire them properly.
Inspect all wiring at the power terminal block for loose connections, poor contact, or exposed copper. Reconnect and tighten as needed.
Check that the ground wire is connected
At the power terminal, check whether the ground terminal is connected to an external ground wire. If not, fix it using one of these methods:
See if the user’s electrical system has a ground wire. If yes, run a wire from it to the machine’s ground terminal.
Drive a dedicated galvanized grounding rod (at least 1.5 meters long) into the soil near the machine. Run a conductor from the rod to the machine’s internal ground terminal, and properly insulate the connection point.
Insulation Measures
Insulating the inlet and drain pipes
If the water vending machine is located far from the water source, bury the inlet and waste pipes. Dig a trench at least 30 cm deep, wrap the pipes in rubber-plastic insulation foam for frost protection, then cover them with soil.
If burying the pipes isn’t possible and they must remain above ground, install a heat trace cable and wrap them with rubber-plastic insulation foam.
Steps to follow:
Step 1: Take a length of heat trace cable, tape one end with electrical tape to ensure waterproofing and insulation.
Step 2: Slit open a piece of rubber-plastic insulation foam, wrap it around both the heat trace cable and the pipe.
Step 3: Seal the foam with foil tape so no gaps remain.
Apply heat trace cable to all three pipes: inlet, concentrate (waste), and drain. Inside the water vending machine, run the heat trace cable up to the internal water inlet/outlet points. Insulate the bottom of the machine with rubber-plastic foam, and seal the pipe entry/exit points.
At the base of the machine, place standard 24 cm bricks about 3 cm inward from the edges of the cabinet, then apply a cement-sand layer (mix ratio: 1 part cement to 2 parts sand). Once the cement hardens, inject foam insulation (about two 900 ml cans) through the holes in the baseplate.
Add heat trace cable where the drain pipe meets the air, and slope the drain pipe slightly to prevent standing water from freezing.
During inspections, check that the drain pipe flows freely. During normal operation, water should flow full-pipe through the drain.
Checking the heater lamps
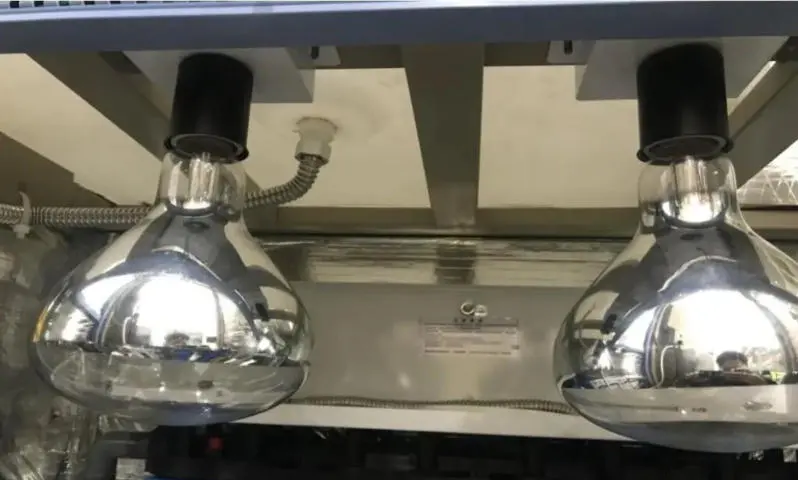
Heater lamps: Screw them firmly into the sockets, configure the temperature controller, and verify they work properly.
Temperature controller settings:
When the ambient temperature drops below 5°C, users need to provide two 275W bathroom heater lamps and install them in the designated positions inside the machine to ensure proper operation. After installing the lamps, set the temperature controller as follows:
- With the controller in normal mode (displaying current internal temperature), press the “M” button once. The display shows the lower temperature limit (the temperature at which the lamps turn on). The lower-left indicator light will come on. Use the “+/-” buttons to adjust the value as needed. (Factory default is “02”, meaning the lamps turn on at 2°C. Adjust based on the actual ambient temperature.)
- Press the “M” button again. The display shows the upper temperature limit (the temperature at which the lamps turn off). The upper-left indicator light will come on. Use the “+/-” buttons to adjust the value. (Factory default is “10”, meaning the lamps turn off at 10°C.)
- Press the “M” button again. The display shows the delay time between turning on the two lamps. Both left-side indicator lights will come on together. (Example: If set to “05”, when the internal temperature drops below the lower limit, the first lamp turns on. If after 5 minutes the temperature still hasn’t reached the upper limit, the second lamp turns on. Factory default is “00”, meaning both lamps turn on simultaneously.)
- Press the “M” button once more to return to the main display. Setup is complete.
Adjust the internal waste pipe: The waste pipe inside the machine runs through sheet metal. Pull it out and reposition it in front of the filter housings, as shown in the diagram.
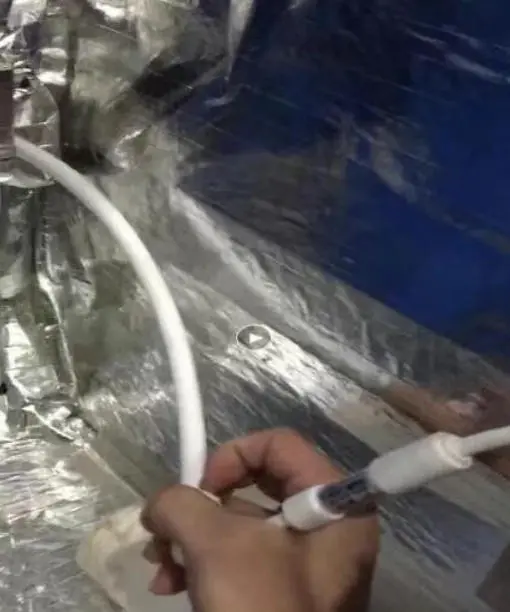
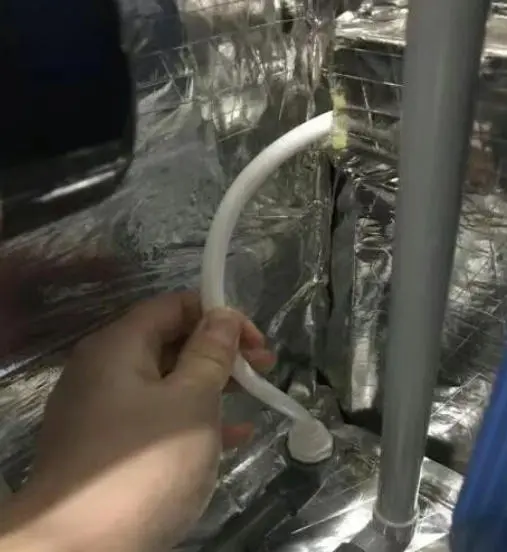
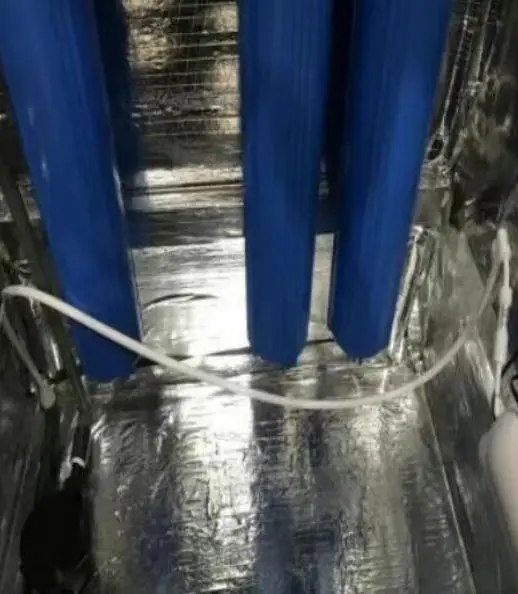
Checking that heat trace cables are properly connected (for cases where they haven’t been connected)
Open the electrical panel and check if heat trace cables are connected at the connection points. If not, follow these steps:
Use a crimping tool to attach cable lugs to the pre-installed heat trace cable ends, then connect them to the power terminal block. (If the ambient temperature is above 5°C, this may not be necessary.) Check that the heat trace cable warms up properly. Recommended cable: 8 mm self-regulating flame-retardant type.
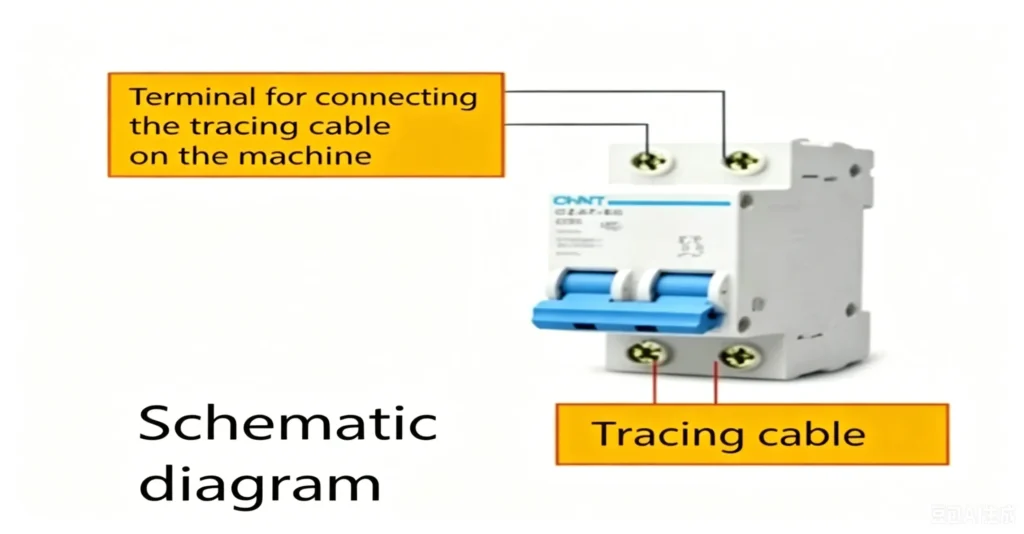
Installation environment for the water vending machine
Avoid placing the water vending machine in direct wind. Ideally, position it with its back against a wall.
Emergency Response
The water vending machine must remain powered 24/7. If a power outage lasts more than one hour, close the inlet valve, remove the filter cartridges from their housings and bring them indoors, and fully submerge the RO membrane in purified water. Drain all water from the internal piping to prevent freezing. After power is restored and the internal temperature reads above 10°C, reinstall the filters and RO membrane. Do not force-start the machine before that. After restarting, check for leaks and address any you find.
In freezing weather, municipal water pipes can burst. If the supply line freezes or water is shut off, avoid using the machine during the outage. Close the inlet solenoid valve if possible. Once water is restored, run the customer’s tap first to flush out any sediment or debris, then open the machine’s inlet valve to resume operation. This prevents sand, rust, and other particles from entering the purification system, which could quickly clog filters and damage the machine.
RO membrane output naturally decreases in cold weather due to changes in water viscosity and activity. It’s normal for winter production to be lower than summer production, with a corresponding increase in concentrate (waste) water. Output will return to normal when temperatures rise.
Related Articles
- Characteristics of Reverse Osmosis Membrane Fouling and Reverse Osmosis Membrane Cleaning Methods
- RO Plant in Dialysis: A Detailed Guide to the Reverse Osmosis System
- RO Plant for Dialysis: A Detailed Guide to the Pretreatment System
- How to Design a Dialysis Water Distribution Loop When a 40-machine Center Opens with Only 10 Machines
- Vertical vs Horizontal RO Membranes: Does Installation Orientation Matter?
- Optimizing Circulating Cooling Water Systems Using Reverse Osmosis Membrane Filtration Permeate
- Control and Prevention of Silica Fouling on RO Membranes
- RO Membrane Antiscalant Dosing: From Calculation Principles to Practical Application
- RO System Design: Series Staging or Concentrate Recirculation for Small RO Systems?
- Small Reverse Osmosis Plant Process Details (0.5m3/Hour)
- Besides reverse osmosis membrane flux, what other key design parameters are easily overlooked but can significantly impact membrane life?
- NF Membrane VS RO Membrane VS Forward Osmosis Membrane
- How to Calculate Recovery Rate RO System?
- Relationship Between RO Membrane Element Pressure Limits and Recovery Rate in Water Reuse and Zero Liquid Discharge Applications
- How to Choose RO Membranes from China: 3 Key Factors to Consider